![]()
![]()
![]()
![]()
![]()
![]()
|
|
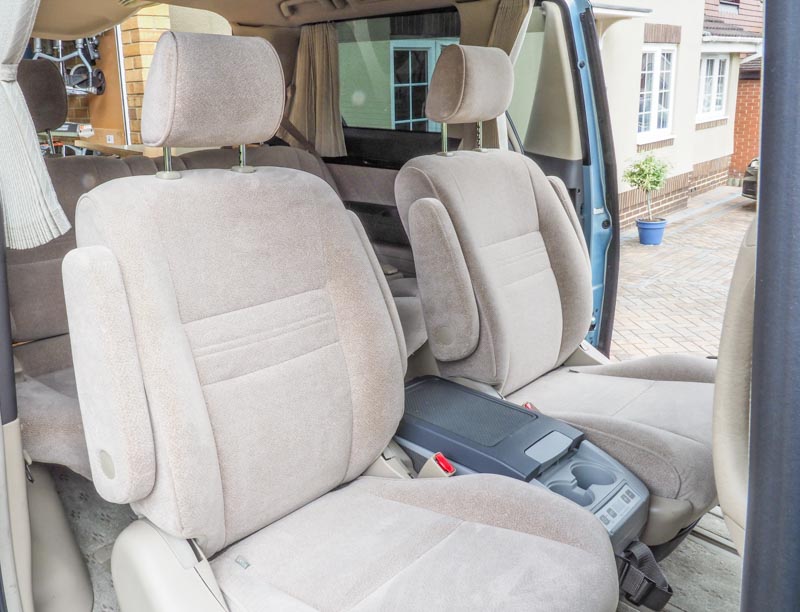
I was keen for a vehicle that could transport my sailing gear, including the sailbox for an A Class, and also serve for family outings with friends and grandchildren. We purchased an imported Toyota Alphard Hybrid (Fig. 1) with relatively low mileage and very clean bodywork. Some advantages of the Alphard are that it comes with separate air-conditioning and heating for the rear compartment, and the 7-seat version has the option of rotating seats for the middle row. An option which was installed in our example was powered curtains at the tail gate and 2nd and 3rd row of seats. Advantages of the hybrid version in particular are that it comes with straightforward 4-wheel drive, great for pond-side access, and with a remarkable set of 3 sockets for 100 VAC 1500 W at the rear and middle of the car (operative only while the engine is running, however, not when parked-up).
Fig. 1: Imported Toyota Alphard Hybrid MPV
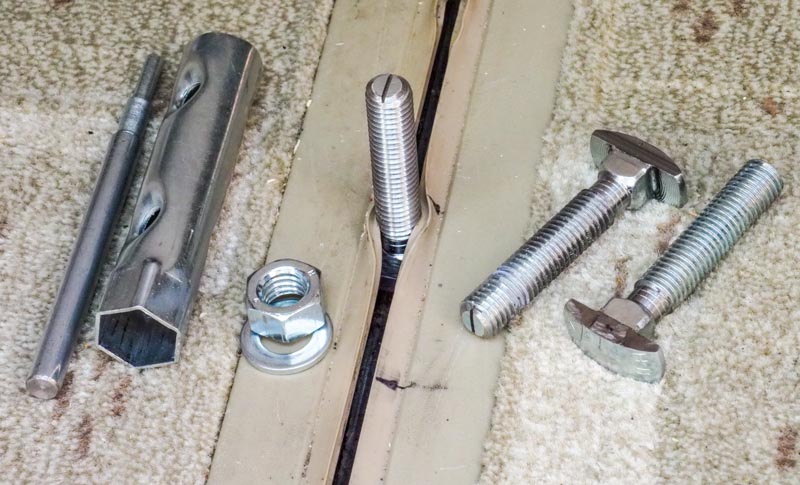
Some fundamental decisions were made. First, I did not want to convert it to a camping van. Although the seats will fold flat and can be converted to single or double beds, we decided that we'd rather sleep and shower comfortably in a local hotel or hostelry. This decision had major consequences: the major appliances (hob, oven, fridge) could be scaled down; and running hot water, shower cubicle, or a site electrical hook-up were not necessary. In turn, this also meant we did not need to install any gas appliances or substantial gas bottle(s). A major driver for this decision was a desire to minimise, or completely avoid, piercing the car body or floor with furniture fastenings, site hook-ups, water filling, gas locker vents, fridge vents, or heater flues. Second, I wanted the installation to be reversible, and to be able to turn the vehicle back into something like a car on 5 minutes notice. Didn't quite manage this one, since the Webasto auxiliary heater is permanently installed, as is the pop-up roof. The consequence of reversibility meant that the units needed to be fixed in place using existing equipment and fittings, and so considerable time was spent exploring the use of the seat tracks. It turned out that the track channel internal dimensions were around 1/2 " wide and around 1/2" deep, an almost perfect fit for M12 fastenings. The solution was to use 'mushroom head' M12 stainless steel carriage bolts and trim off two sides of the head (Fig. 2). They would drop into place in the track, and with a quarter turn could be pulled up so their square-section shank would lock in place and allow anything to be securely bolted to the floor.
Fig. 2: M12 carriage bolts
Third, I wanted the furniture arrangement to allow stowage for an A Class sail box and associated hull. An A Class sail box is quite large and long, so this meant that at least one furniture arrangement would have to be along the vehicle side. Another arrangement, to give maximum seating, would have the furniture at the rear. Around 30 design plans later, I arrived at the version I wanted to build (Fig. 3).
Fig. 3: Outline units design.
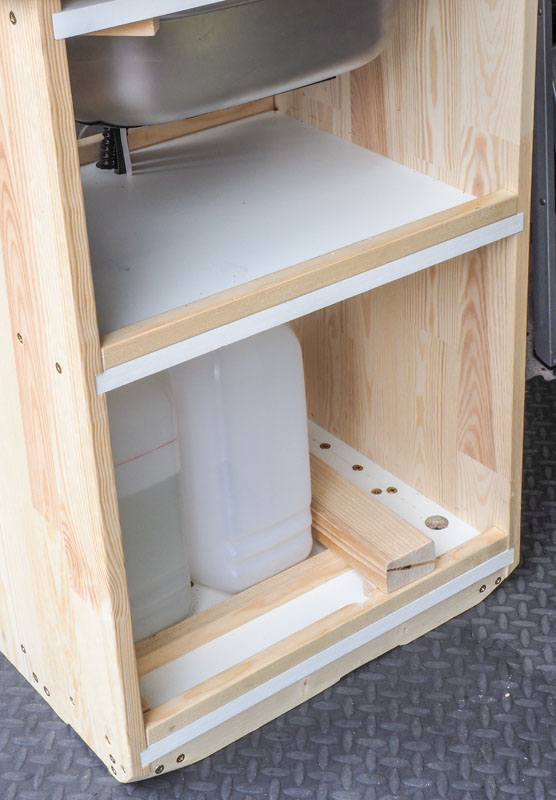
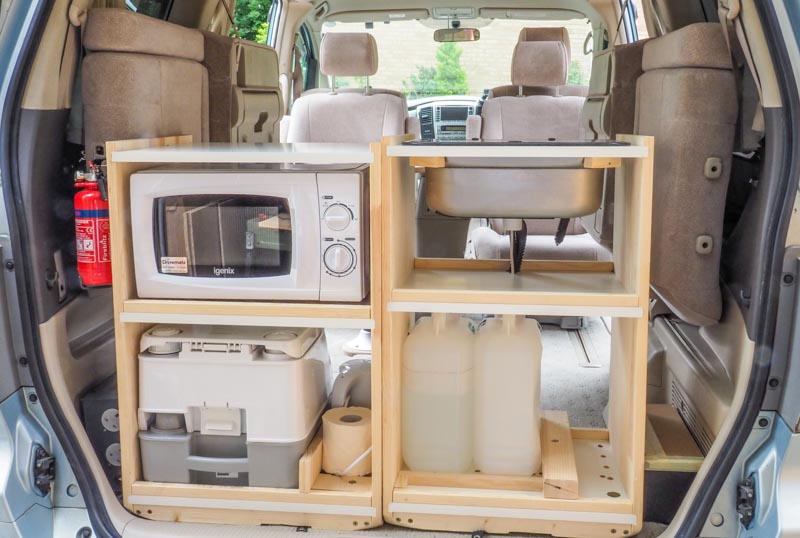
Because the units were designed to be arranged three ways -- down the side of the vehicle, at the rear facing forward, or at the rear facing backwards for those rain-free outings -- the structure was an open frame without backs, just sides. For convenience, a unit depth of 400 mm was chosen since that was a standard width of shelving from the DIY store. Unit height was determined by the requirement to fit the four major picnic items (pretty much in this order of priority!): portapotti (Dometic 972), microwave (Daewoo clone, down-rated to 500 W output power from https://www.kitchenwareonline.com/ ), wash basin (Smev 8005 from https://www.jacksonsleisure.com/), and water bottles (2 x 10 l) (Fig. 4).
Fig. 4: Outline units major contents
This design gave us a side layout for regatta events and seating 3 inside (Figs. 5 & 6), or a rear layout for outings and seating 5 inside (Fig. 7). In all illustrations, the front row of seats are shown as far forward as possible.
Fig. 5: Side layout - travelling to a regatta event, 4 or 5 people
Fig. 6: Side layout - parked up at a regatta event, seating 3 inside for the
picnic
Fig. 7: Rear layout - outings, travelling with up to 7, picnic seating with 5 inside
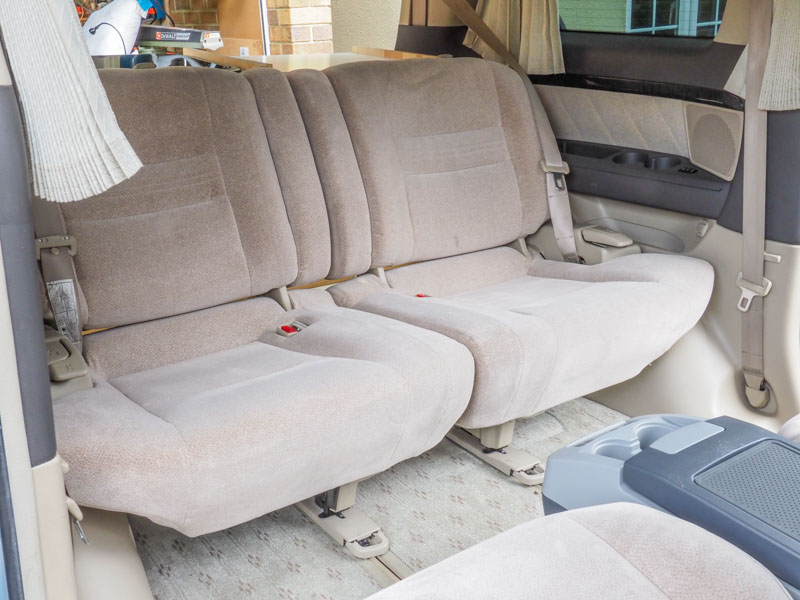
The fifth major item was the portable fridge, a Dometic CDF11 (should have spent an extra few pounds and got the version with dual 12 V / 230 VAC), which as it turned out fitted perfectly between the middle row seats (Fig. 8).
Fig. 8: Portable fridge
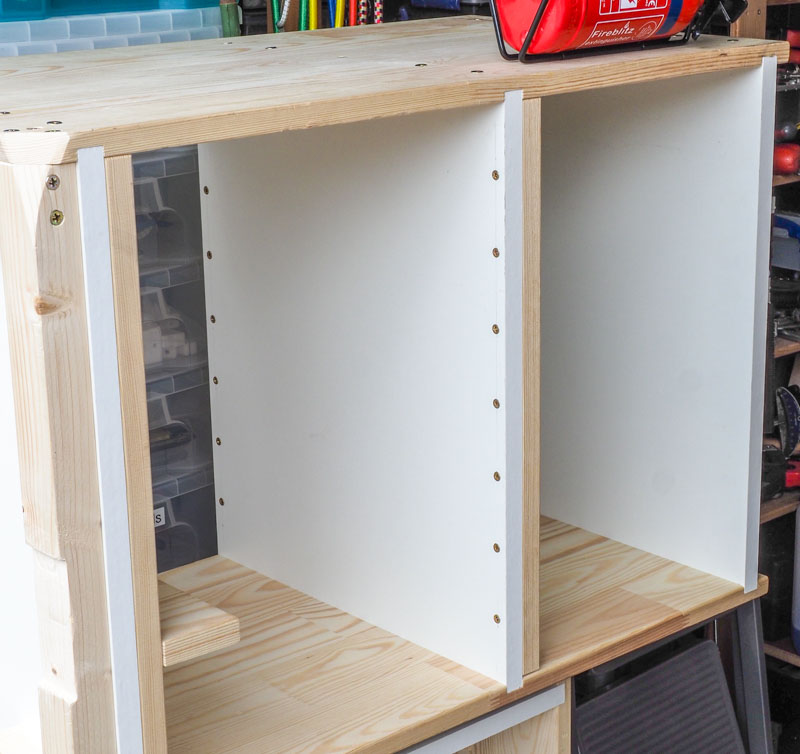
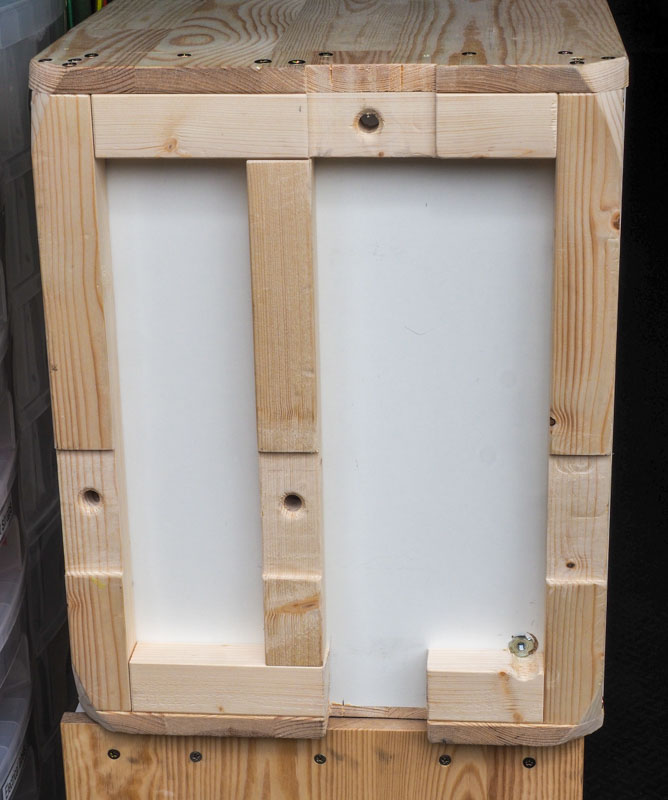
Some time was spent agonising over the electrics, but the early design decisions made this relatively easy. The equipment needing more or less continuous 12 V power (auxiliary heater, fridge, water pump for wash basin) could run off a battery, and the equipment needing 230 VAC (coffee maker, kettle, toaster, microwave) only needed it for 5 or 10 minutes at a time so could be provided by running the car engine for that time. No need for an inverter or a particularly high capacity (heavy!) battery. However, the battery arrangements for a hybrid are somewhat different from the arrangements for a conventional engine. The 12 V hybrid battery as fitted is very much an auxiliary with capacity in the region of 45 or 50 Ah. It is only needed by the car when the hybrid system is not active in order to run the car electronic control systems. It is one of the Achilles heels of the Toyota hybrid system -- if the 12 V battery goes flat for any reason, the car won't start. Not because the engine won't crank, that isn't the issue since cranking power is provided by the hybrid battery, but because the electronics don't have enough juice to energise. This means that the 12 V vehicle battery shouldn't be used to run the picnic equipment. For a while, I planned a gel or mat battery with associated controller for engine or mains charging, but didn't like the bulk and inconvenience. I then saw a LiFePO4 battery with integrated mains charger (the PowerXtreme X30 from http://www.powerxtreme.nl/en/) in a caravan shop, intended for powering a caravan's mover motor. It was 30 Ah, would cheerfully discharge until flat over 1500 cycles, and was amazingly light. It had an eye-watering price, but a couple of hours on a spreadsheet convinced me that the lifetime cost was entirely comparable to an equivalent 90 Ah gel with associated charging control equipment and wiring and expected life of 300 cycles if discharged until flat. The units were built from 400 mm shelving, the uprights in pine and the shelves in white melamine laminate over chipboard, using pine battens and far more screws than strictly necessary (Figs. 9, 10, & 11).
Fig. 9: Unit construction detail
Fig. 10: Unit construction detail
Fig. 11: Unit construction detail
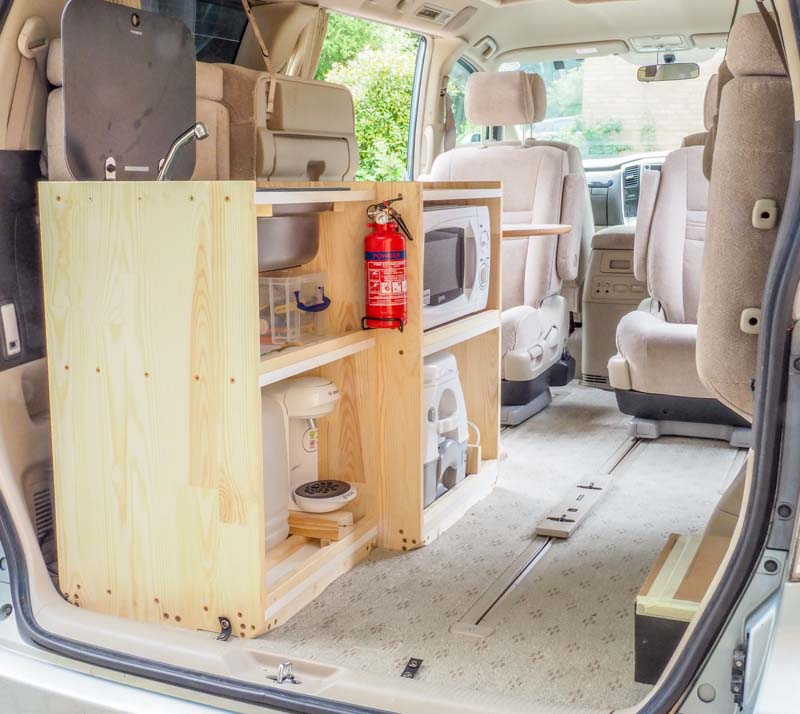
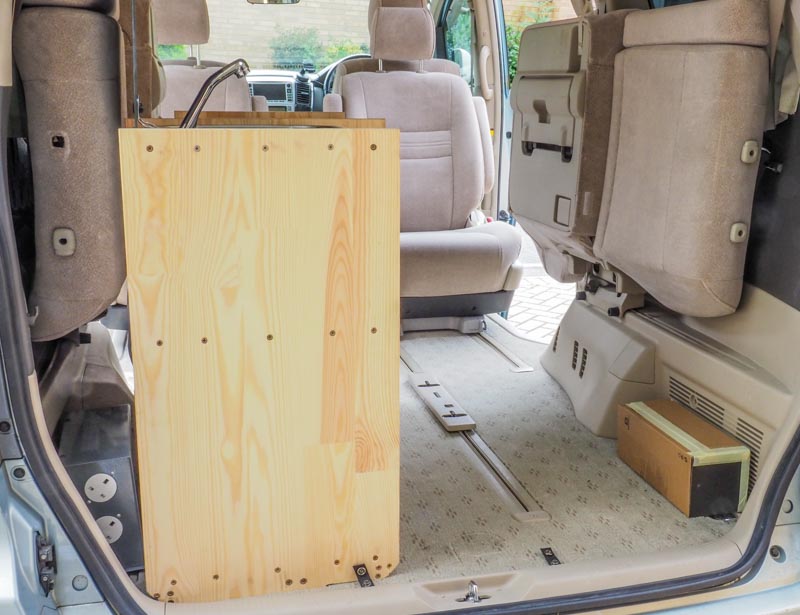
The units install either along the side or at the rear. When along the side, one of the 3rd row seats can be up or down. If down, access is obviously restricted... (Figs 12, 13, & 14).
Fig. 12: Side installation, view from outside
Fig. 13: Side installation, view from outside
Fig. 14: Side installation, view from inside
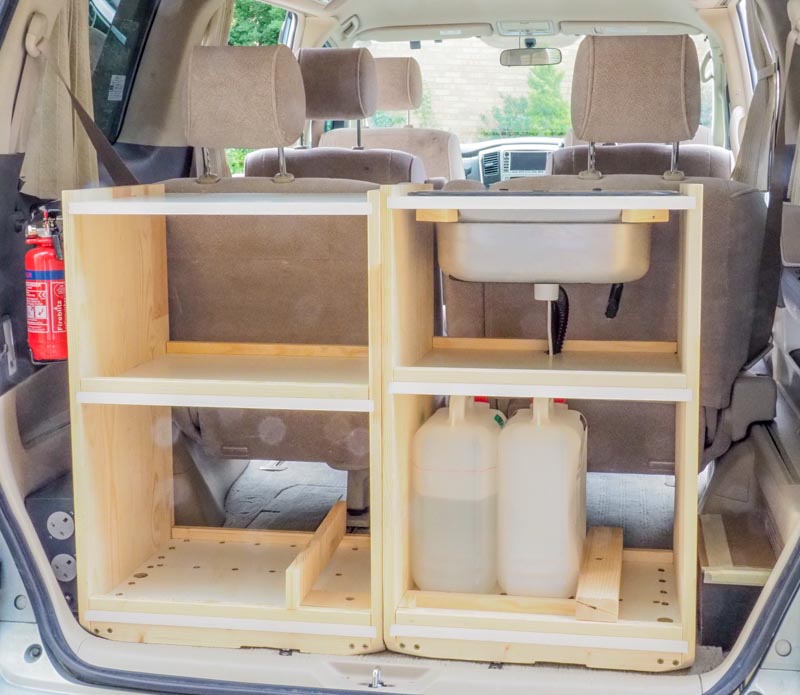
When at the rear, the 3rd row of seats can be folded up or put in place (Figs. 15, 16, 17, & 18). Because the units are open front and rear, microwave and portapotti units can be reversed for access from either end. Access for the wash basin needs a little more planning, (if its lid is kept on) in that its unit needs to be rotated before installation following a guess whether the sun will shine or not. The photos assume a sunny day and hence access from outside the vehicle with the tailgate up.
Fig. 15: Rear installation, view from outside
Fig. 16: Rear installation, view from inside
Fig. 17: Rear installation, view from outside
Fig. 18: Rear installation, view from inside
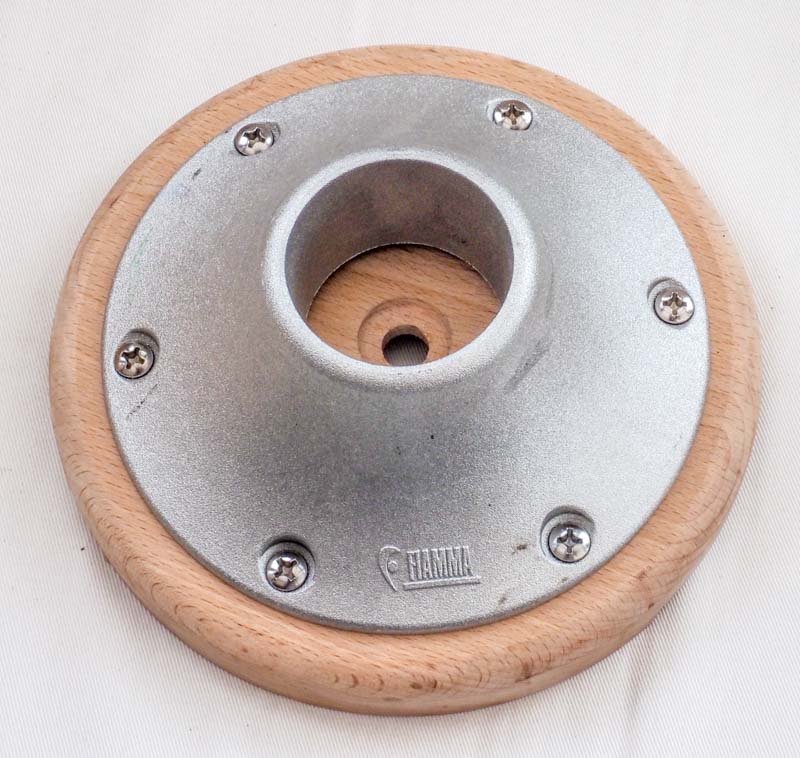
The tables use Fiamma's island legs. A leg boss is screwed to a base (Fig. 19) which is bolted to one of the tracks, the leg dropped in, and the table placed on top. A base can be positioned as desired on either track. The table top swivels, so it can be usefully offset from the leg boss to allow any amount of clearance when entering or leaving and then swinging closer when seated. I've made up two bases and two small tops, with plans to make a larger table top that'll sit on two legs.
Fig. 19: Table base construction detail
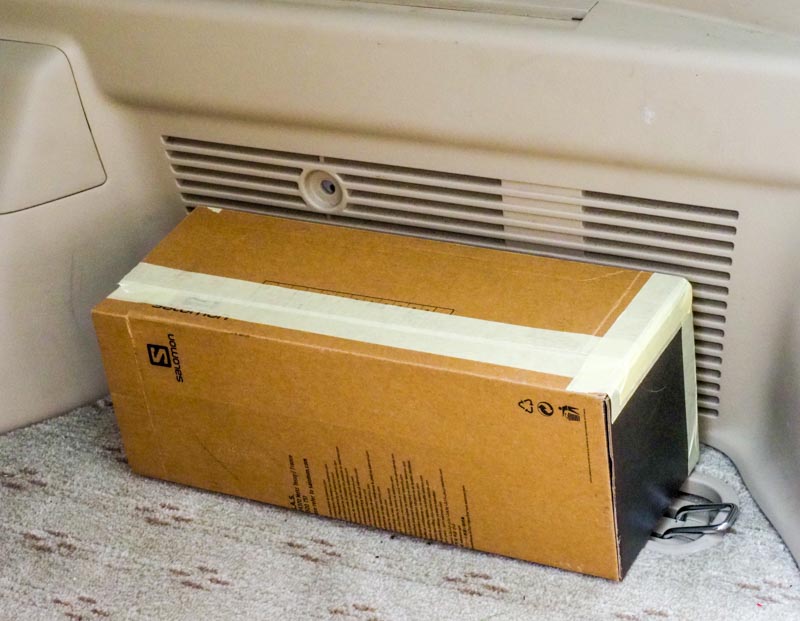
Fig. 20: Rear detail
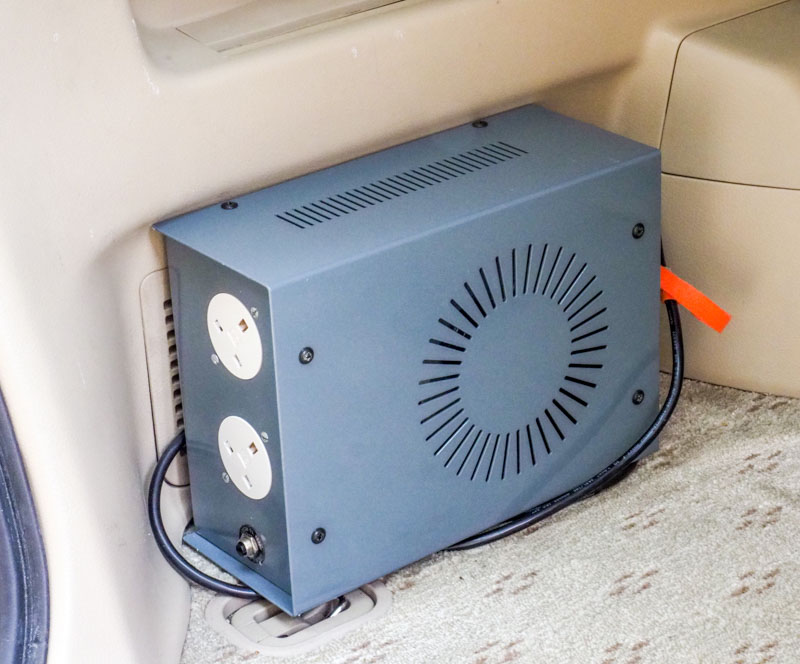
PostscriptAfter some years of use, there is very little I would change. The flexibility of the installation is exceptional, the units can be removed in around 3 minutes to give a clear load area, and reconfigured in 3 minutes from side to rear to front facing as might be required. The Airlink step-up transformer is a brilliant plug-in to the Alphard 100 VAC provision (itself given by inverters powered by the hybrid 415 V battery pack), sadly Airlink seems to have gone out of business. The one niggle is that the Webasto heater needs to be run up every 2 or 3 weeks for 10 or 15 minutes to prevent the petrol feed from gumming up. Yes, I learned this the hard way. I'm confident this applies to any similar design, eg from Eberspacher, because of the volatility of petrol; their diesel heaters apparently do not have this issue. A related issue is that the installation of the Webasto was non-trivial. The vehicle's fuel delivery pipe is inaccessible and so cannot be tapped or "T"-ed, protected by layers of shielding because of the dangers given by the hybrid voltages in case of any accident. Instead, the feed to the Webasto requires a drop pipe into the petrol tank. There is access to the tank given from a panel in the floor, but that needs complete removal of the carpet and under-felt.... Did I say "non-trivial"? 2023-08-14 |
|
©2025 Lester Gilbert |