![]()
![]()
![]()
![]()
![]()
![]()
|
|
|
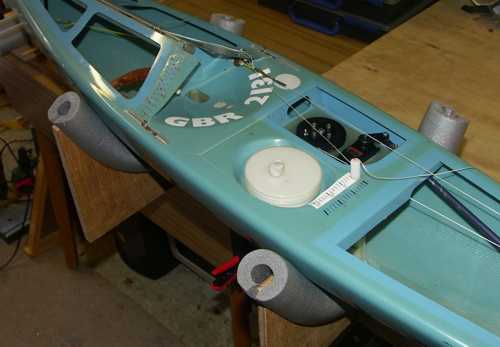
Updated October 2009 I noticed a rather useful cradle in the SAILSetc workshop some years ago, used for working on a hull at bench height. After copying it and using it at home, I thought I'd illustrate it. Photo 1 gives the general idea.
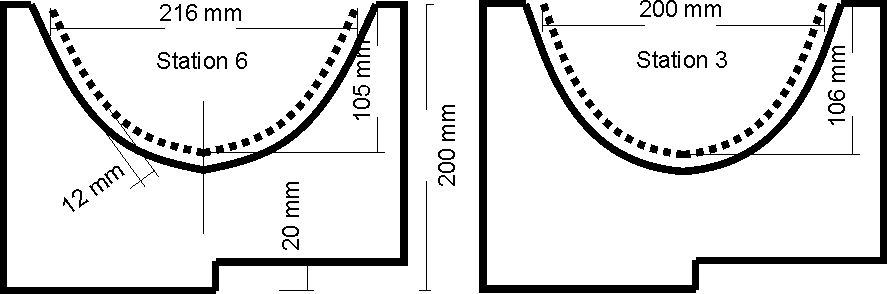
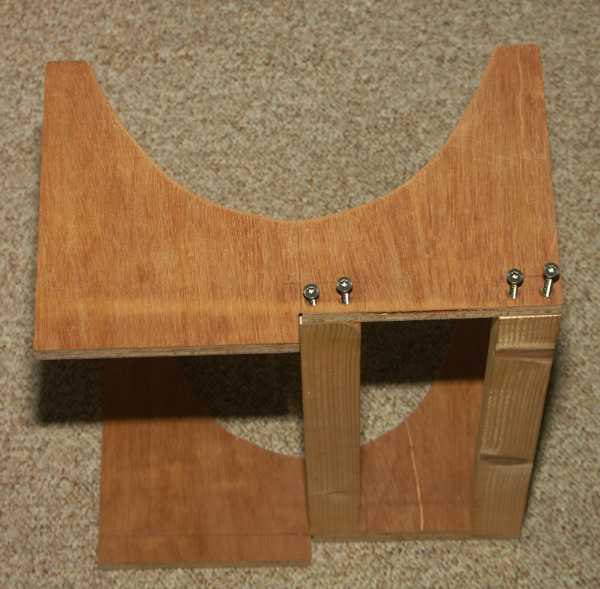
Prepare the wood as shown in Photo 2, using the dimensions from Figures 1 or 2. The IOM cradle should suit any medium to narrow beam boat. If you have a wider beam boat, some widening of the station 6 cradle should accommodate it. The two plates are spaced 300 mm apart.
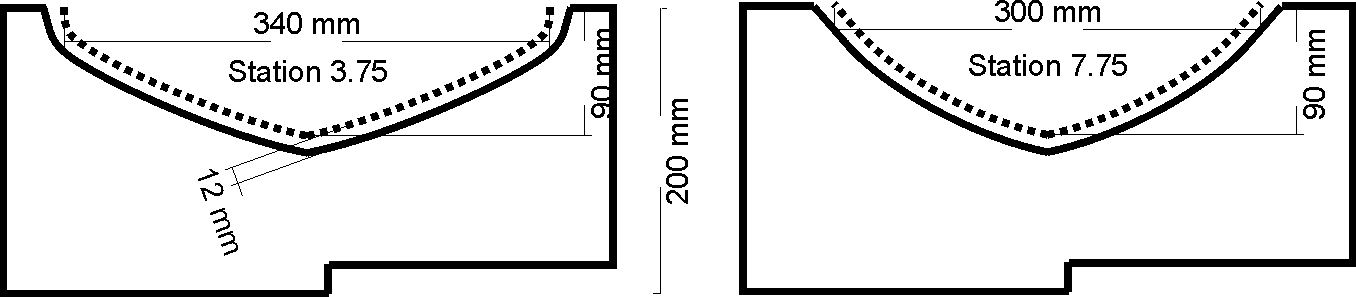
The 'A' Class cradle should handle any medium to light displacement 'A' Class boat. Its plates are spaced 400 mm apart.
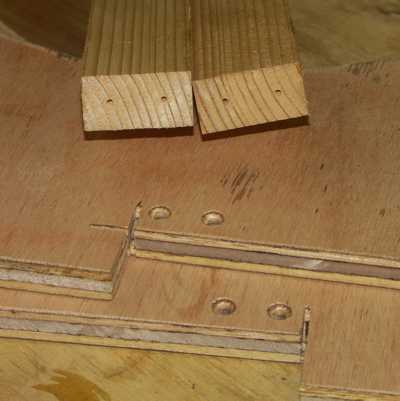
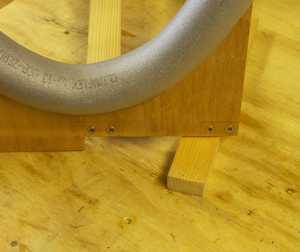
Photo 3 shows an IOM cradle being assembled. Just screw the end plates onto the two bars.
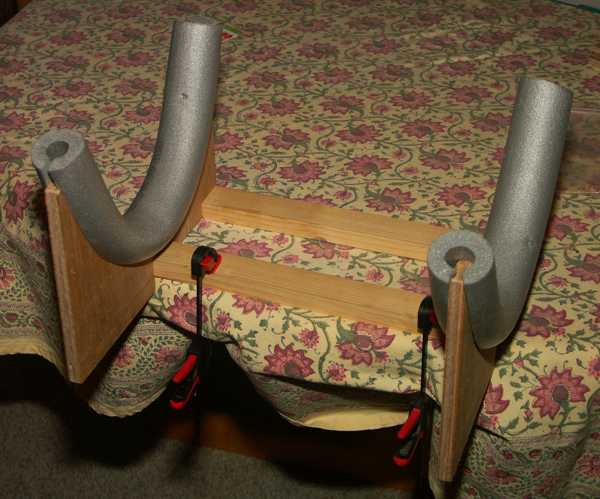
Split the foam pipe insulation, lay it over each plate to provide a cushion, and trim. The cradle is ready to be clamped to the nearest bench or table, illustrated in Photo 4.
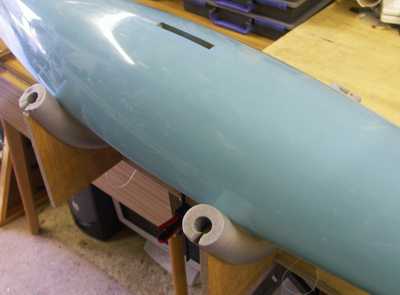
Here is the science bit. Each plate is shaped to suit the lines of a SAILSetc SWORD or an ITALIKO, so the hull will rest evenly on the foam. The lines of the hull cross-sections of these two designs have been expanded 12 mm so when they are cut out onto the end plates they allow for the thickness of the foam. If you have some other design, check the measurements below in Figures 1 & 2. The cradle centre-line hangs over the edge of the table by 10 mm, so the cradle can hold the boat with fin and rudder installed. If you are working on the radio control, remember:
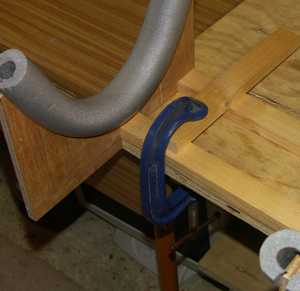
DO NOT ACTUATE THE RUDDER If you have an 'A' Class boat and want to carry it in the cradle with ballast, then please take care! First, if the cradle plates are not particularly thick (12 mm ply or 18 mm MDF) (even with the foam padding) they may damage the hull due to their low bearing area and high loading. Second, the simple clamp arrangement on the front bar as illustrated in Photo 4 is NOT safe enough. You MUST clamp or screw the rear bar to the table, in addition to or instead of the front bar. The cradle itself is strong enough; just secure it carefully! Photo 5, below, illustrates one possibility -- placing a length of wood across the bars, and clamping that mid-way. Be sure to check the clearance between the bottom of the hull and the clamp. While the cradle has considerable vertical rise (around 90 to 100 mm), I don't know how large your clamps might be.
There are other ways to use the cradle. If you want to work on the undersides of the boat, the opening of each plate is intentionally wide enough to take the hull upside-down, resting on the gunwale. Remember that the hull is not particularly stable in this condition, however, so work carefully, ESPECIALLY if you have the ballast attached!
If you want to work on the canoe body (ie without fin or rudder in place) and want the whole of the hull and cradle to sit on the bench, 20 mm packing pieces can be inserted under the cut-way part of the plates.
If you wanted to construct a box for use at the pond-side, popular for an 'A' Class with some sailors, simply make your box (a little lower than you might otherwise have done) and then screw a plate to each end. If you do this for an 'A' Class, be sure that the ballast is resting on the base of the box and that the keel is in fact taking all of the load. 2009-10-10 |
|
©2025 Lester Gilbert |